

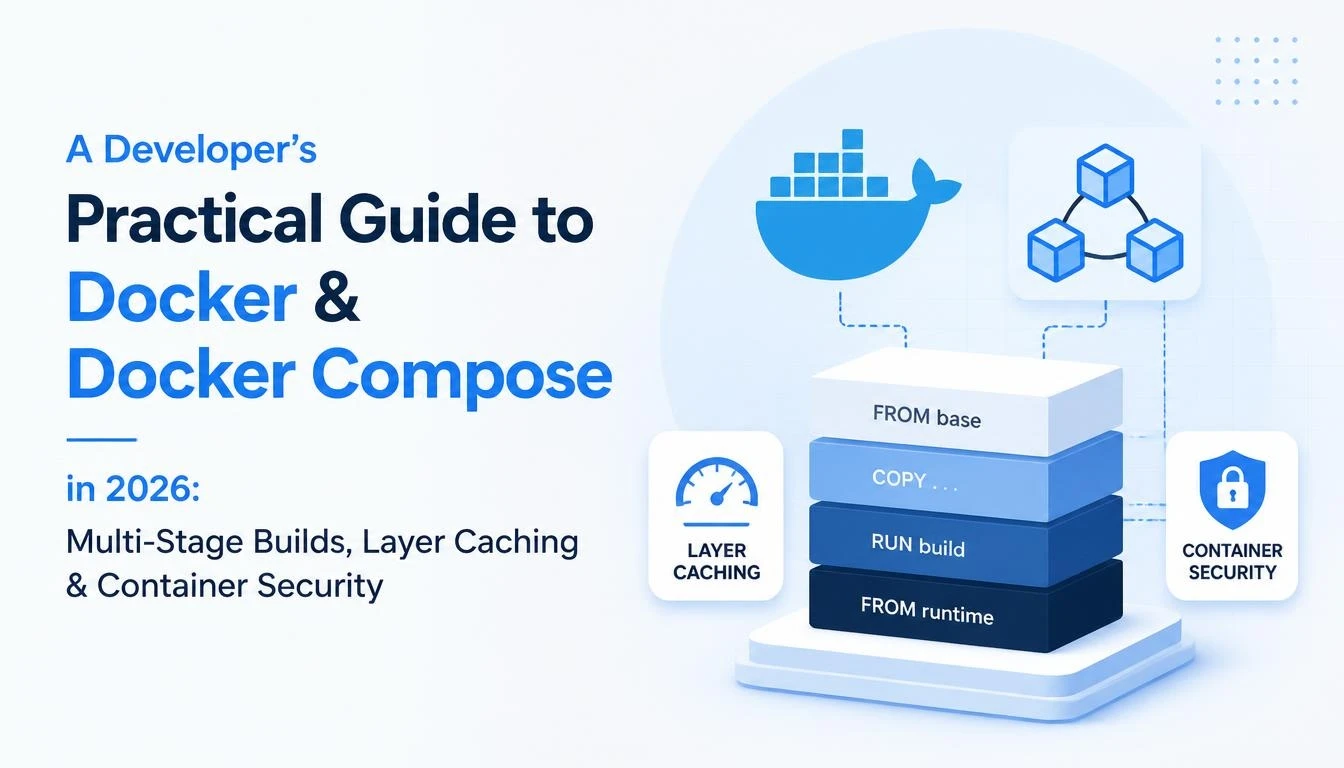
1. The Architectural Divide: Virtual Machines vs. Linux Containers Under the Hood
To build reliable, production-grade containerized systems, developers must discard the common misconception that 'a container is just a lightweight virtual machine.' While both technologies provide isolation, their architectural mechanics and operating system footprints are fundamentally different.
Virtual Machines: Hardware-Level Virtualization (Type-2 Hypervisor)
In a traditional virtual machine architecture (VMware ESXi, KVM, VirtualBox), a software hypervisor abstracts physical hardware (CPU, RAM, network controllers, storage disks) into virtual hardware slices. Each virtual machine installed on that hypervisor must run a complete, independent guest operating system (kernel, device drivers, init systems, user packages, system utilities).
This architecture imposes severe operational penalties:
• Massive Resource Overhead: A basic Ubuntu or CentOS VM consumes 1.5 GB to 4 GB of RAM just to boot the guest kernel and background system daemons (systemd, udev, journald) before your application code executes a single line.
• Slow Boot Latency: Booting a full guest operating system requires traversing virtual BIOS/UEFI initializations, kernel decompression, device enumeration, and init runlevels, taking anywhere from 45 seconds to several minutes.
• Inflexible Scaling: Scaling out a cluster of 20 virtual machine instances requires dozens of gigabytes of dedicated RAM and heavy disk I/O cloning operations.
Docker Containers: Operating System-Level Process Virtualization
A Docker container contains no guest operating system and no hypervisor. It is a standard, native Linux process executing directly on the host operating system's kernel. The Docker daemon, containerd runtime, and runc toolchain leverage native Linux kernel primitives to isolate the process from the rest of the host system.
• Near-Zero Resource Overhead: Because containers share the host's Linux kernel, an Alpine-based Node.js or Go container consumes only the memory strictly required by the application process itself (e.g., 25 MB to 60 MB of RAM).
• Sub-Second Startup Times: Starting a container does not boot a kernel; it simply executes fork() and execve() system calls within isolated kernel namespaces, launching in less than 150 milliseconds.
• Extreme Density: A single 16 GB cloud VM that could host only 3 or 4 full virtual machines can easily host 80 to 120 isolated microservice containers without CPU thrashing.
- Hypervisor vs Kernel Primitive: VMs virtualize physical hardware; containers isolate operating system processes.
- Memory Footprint: VMs require 2-4GB per guest OS; containers require only application memory (20-60MB).
- Startup Latency: VMs require minutes to boot; containers start in milliseconds via native Linux system calls.
2. The Three Pillars of Containerization: Namespaces, cgroups & OverlayFS2
Every container runtime in existence (Docker, containerd, CRI-O, Podman) relies on three core Linux kernel subsystems. Understanding these primitives transforms container debugging from guesswork into predictable engineering.
1. Linux Namespaces (The Visibility Walls: 'What the container can SEE')
Namespaces wrap global system resources into isolated abstractions. A process running inside a namespace believes it has its own private instance of that system resource:
• PID Namespace (Process Isolation): The application process inside the container is assigned Process ID 1 (PID 1). It cannot see or send signals to host processes running outside its container boundary.
• NET Namespace (Network Isolation): Provides the container with its own private loopback interface (lo), virtual Ethernet adapters (eth0), routing tables, and IP filter rules. An application inside a container can bind to port 8080 without conflicting with another container binding to port 8080 on the same physical host.
• MNT Namespace (Mount / Filesystem Isolation): Provides an isolated root filesystem (/). The container can mount or unmount filesystems without impacting the host's disk mount table.
• IPC Namespace (Inter-Process Communication): Prevents containers from accessing shared memory segments, POSIX message queues, or semaphores belonging to other processes.
• UTS Namespace (Host & Domain Identity): Grants the container its own distinct hostname and domain name.
• USER Namespace (UID/GID Mapping): Maps a container-internal root user (UID 0) to an unprivileged user (e.g., UID 10001) on the host system, creating a security boundary against privilege escalation attacks.
2. Control Groups / cgroups v2 (The Resource Leash: 'What the container can USE')
While namespaces restrict what a process can see, Control Groups (cgroups) meter, allocate, and limit what hardware resources a process can consume:
• Memory Limits (--memory=512m): Enforces a strict ceiling on resident memory. If a container develops a memory leak and attempts to consume more than 512 MB, the Linux kernel triggers the Out-Of-Memory (OOM) Killer to terminate that specific container, preventing host system crashes.
• CPU Quotas (--cpus=1.5): Uses the Linux Completely Fair Scheduler (CFS) bandwidth control to throttle CPU core execution time slices, ensuring runaway infinite loops do not starve neighboring containers.
• Block I/O Throttling: Restricts read and write throughput (IOPS) to prevent a disk-intensive container from freezing disk access for other workloads.
3. Union Filesystems: OverlayFS2 (How containers STORE data)
Docker images are built from stacks of read-only layers. OverlayFS2 combines these layers into a single unified directory view:
• Lowerdir (Read-Only Image Layers): Immutable tarballs containing the base OS files, runtime libraries, and compiled application assets.
• Upperdir (Thin Read-Write Container Layer): An ephemeral writable layer created dynamically when a container starts.
• Merged (The Unified View): When the application reads a file, OverlayFS2 reads from the lowerdir. If the application modifies a file, OverlayFS2 executes a Copy-on-Write (CoW) operation: copying the file up to the upperdir before writing modifications. The underlying image layer remains pristine and unchanged.
- Namespaces: Partition kernel visibility (PID, NET, MNT, IPC, UTS, USER).
- Control Groups (cgroups v2): Enforce hard limits on RAM, CPU quotas, and disk I/O bandwidth.
- OverlayFS2 Union Mounts: Combine immutable read-only image layers with an ephemeral Copy-on-Write writable layer.
3. Writing Production-Grade Multi-Stage Dockerfiles
A common anti-pattern in container development is shipping compilers, build dependencies, source code, and development toolchains directly inside the final runtime container image. Packaging development dependencies like gcc, npm, maven, git, and build headers inflates image sizes from 50 MB to over 1.5 GB and introduces hundreds of known security vulnerabilities (CVEs) into production clusters.
The Multi-Stage Build Solution
Multi-stage builds allow developers to define multiple FROM instructions within a single Dockerfile. Each stage uses a distinct base image optimized for its specific task. Build tools and compilers are isolated to intermediate build stages, and only compiled production artifacts are copied into the lean, minimal final stage.
Complete Production Blueprint: Multi-Stage Node.js / TypeScript Dockerfile
``dockerfile``
# syntax=docker/dockerfile:1
# ==============================================================================
# Stage 1: Build & Compilation Stage (Heavyweight Toolchain)
# ==============================================================================
FROM node:22-alpine AS builder
WORKDIR /build
# 1. Copy dependency manifests first to leverage Docker layer caching
COPY package*.json tsconfig.json ./
# 2. Clean install all dependencies (including devDependencies needed for compiling)
RUN npm ci
# 3. Copy application source code
COPY src/ ./src/
# 4. Compile TypeScript into production-ready JavaScript bundle
RUN npm run build
# 5. Prune devDependencies to keep only production node_modules
RUN npm prune --production
# ==============================================================================
# Stage 2: Hardened, Minimal Production Runtime Stage
# ==============================================================================
FROM alpine:3.20 AS runner
# 1. Install lean Node.js runtime and dumb-init process supervisor
RUN apk add --no-cache nodejs dumb-init && \
# Create a dedicated unprivileged application user and group
addgroup -g 10001 appgroup && \
adduser -u 10001 -G appgroup -s /sbin/nologin -D appuser
WORKDIR /app
# 2. Set production runtime environment flags
ENV NODE_ENV=production \
PORT=3000
# 3. Copy only compiled output and production node_modules from builder stage
COPY --from=builder --chown=appuser:appgroup /build/node_modules ./node_modules
COPY --from=builder --chown=appuser:appgroup /build/dist ./dist
COPY --from=builder --chown=appuser:appgroup /build/package.json ./
# 4. Enforce non-root execution by switching to unprivileged appuser
USER appuser:appgroup
# 5. Expose documented network port
EXPOSE 3000
# 6. Wrap execution with dumb-init to properly forward OS signals (SIGTERM)
ENTRYPOINT ["/usr/bin/dumb-init", "--"]
# 7. Start application process in exec array format
CMD ["node", "dist/index.js"]
- Eliminate Build Bloat: Strip compilers, package managers, and source code from runtime images.
- 95% Size Reduction: Shrink typical application images from 1.2 GB to under 60 MB.
- Drastically Reduced Attack Surface: Remove package managers (apt, apk) and compilers from production runners.
4. Docker Layer Caching Mechanics & Size Reduction Strategies
Docker builds container images instruction by instruction, from top to bottom. Each instruction (RUN, COPY, ADD) generates a new read-only filesystem layer. When rebuilding images, Docker inspects its local cache: if an instruction and all preceding instructions are unchanged, Docker skips re-executing that step, pulling the pre-built layer from cache in microseconds.
Golden Rules of Layer Caching Optimization
• 1. Order Instructions from Least Frequently to Most Frequently Changed: Base OS dependencies and third-party packages (npm, pip, maven) change infrequently, whereas application source code changes on every Git commit. If you write COPY . . before running npm install, any single-line source code edit invalidates the cache for all subsequent instructions, forcing Docker to re-download hundreds of megabytes of third-party dependencies on every build.
• 2. Chain Shell Commands in a Single RUN Block: Each RUN instruction writes an immutable layer to disk. If you run apt-get update && apt-get install -y curl in one RUN step and rm -rf /var/lib/apt/lists/* in a later RUN step, the deleted cache files remain permanently embedded in the underlying layer. Always chain commands and cleanup routines using && within a single RUN instruction:
``dockerfile``
# Anti-Pattern (Bloats image by 180MB):
RUN apt-get update
RUN apt-get install -y build-essential curl
RUN rm -rf /var/lib/apt/lists/
# Production Best Practice (Zero Layer Bloat):
RUN apt-get update && \
apt-get install -y --no-install-recommends build-essential curl && \
rm -rf /var/lib/apt/lists/
• 3. Implement a Comprehensive .dockerignore File: Exclude local files from the Docker build context. Copying local node_modules, .git histories, .env files, or log files into the build context slows down builds and risks leaking credentials into image layers:
``text``
# .dockerignore
.git
.env
node_modules
dist
.log
coverage/
.DS_Store
• 4. Use Exec Form Over Shell Form for ENTRYPOINT and CMD:
- Shell Form (CMD node index.js): Wraps the command in /bin/sh -c. The shell becomes PID 1 inside the container, intercepting and swallowing SIGTERM signals. When you run docker stop, the application cannot execute graceful cleanup routines and is abruptly killed via SIGKILL after the 10-second timeout.
- Exec Form (CMD ["node", "index.js"]): Launches the application binary directly as PID 1, allowing it to catch SIGTERM signals, close open database connections, and terminate cleanly with zero data loss.
- Manifests First: Always copy dependency manifests before copying source code to maximize cache hits.
- Atomic Command Chaining: Clean up temporary installer caches within the same RUN layer they were created.
- Strict Exec Array Syntax: Always define ENTRYPOINT and CMD using JSON arrays to preserve PID 1 signal forwarding.
5. Container Storage Architecture: Ephemeral Layers vs. Named Volumes vs. Bind Mounts
Containers are designed to be ephemeral: when a container terminates, crashes, or is updated to a new version, any data written to its thin writable layer is permanently destroyed. In production systems, persistent data (database storage files, file uploads, application logs) requires dedicated external storage mechanisms.
Storage Mechanism Comparison
• 1. Ephemeral Writable Layer: The default layer created on top of image layers. Suitable only for temporary scratch files. Features high disk write latency due to OverlayFS2 Copy-on-Write translation overhead.
• 2. Named Volumes (Production Recommended): Storage directories managed entirely by the Docker daemon at /var/lib/docker/volumes/. Named volumes are completely isolated from the host OS directory structure, provide near-native host disk I/O performance, survive container deletions, and can be safely shared across multiple containers concurrently:
``bash``
# Creating and mounting a persistent Named Volume for PostgreSQL
docker volume create pg_enterprise_data
docker run -d \
--name prod_postgres \
-v pg_enterprise_data:/var/lib/postgresql/data \
-e POSTGRES_PASSWORD=SecurePassword123! \
postgres:16-alpine
• 3. Bind Mounts (Local Development): Directly mounts an arbitrary directory from the host machine's filesystem into a container directory (e.g., -v $(pwd)/src:/app/src). Ideal for local development environments because editing code in your IDE reflects instantly inside the running container without requiring an image rebuild. Bind mounts should be avoided in production environments because they depend on specific host directory layouts and introduce file permission inconsistencies across operating systems.
• 4. tmpfs Mounts (In-Memory Security): Mounts directly into host RAM. Data is never written to disk, making tmpfs ideal for storing sensitive decryption keys, session tokens, or high-throughput ephemeral caches.
- Named Volumes: The enterprise standard for production databases, message brokers, and persistent storage.
- Bind Mounts: The developer standard for live code hot-reloading during local sprint development.
- tmpfs In-Memory Mounts: Zero-disk footprints for high-security ephemeral token storage.
6. Software-Defined Container Networking: Bridge, Host & DNS Discovery
Every container operates in its own isolated Network Namespace. To communicate with the outside world and other containers, Docker provides software-defined networking drivers.
The 4 Built-In Network Drivers
• 1. Bridge Network (Default): The standard software-switch virtual network. Containers attached to the same bridge network communicate via virtual Ethernet pairs (veth).
- Default Bridge (docker0): Lacks automatic DNS resolution; containers can communicate only via raw, shifting IP addresses unless legacy links are configured.
- User-Defined Bridge: Provides built-in automatic DNS service discovery. Containers address each other reliably using their container or service names (e.g., postgres://db_postgres:5432/app), completely abstracting internal IP addresses.
• 2. Host Network: Removes network isolation between the container and the Docker host. The container shares the host's network stack directly (no -p port mapping required), achieving maximum network throughput for high-frequency trading or ultra-low-latency streaming workloads.
• 3. None Network: Disables all networking interfaces except loopback (lo). Used for isolated batch calculation jobs or cryptographic key generation.
• 4. Overlay Network: Enables multi-host networking across different physical nodes running Docker Swarm.
Port Publishing (-p) vs. Inter-Container Exposure (EXPOSE)
• EXPOSE 3000: Acts purely as internal metadata documentation. It does not publish the port to the host machine or public internet. Other containers on the same user-defined bridge network can access port 3000 regardless of whether EXPOSE is defined.
• -p 8080:3000: Explicitly binds host port 8080 to container port 3000 via host iptables/nftables rules, making the application accessible to outside traffic.
- User-Defined Bridge Networks: Enable automated DNS resolution between microservice containers.
- Port Security: Never publish internal database ports (-p 5432:5432) to the host in production.
- Host Networking: Bypasses virtual switching for maximum network throughput when necessary.
7. Multi-Service Microservices Orchestration with Docker Compose
Modern applications consist of multiple coordinated services: a reverse proxy gateway, an API backend, a relational database, and an in-memory cache. Managing multi-service stacks through manual docker run commands is error-prone and unsustainable. Docker Compose is a declarative orchestration tool that configures and manages multi-container application stacks using a single YAML file.
Production Architecture Blueprint: docker-compose.yml
``yaml``
version: '3.9'
services:
# ============================================================================
# 1. Reverse Proxy Gateway (Public Ingress)
# ============================================================================
gateway:
image: nginx:1.27-alpine
container_name: enterprise_gateway
restart: unless-stopped
ports:
- "80:80"
- "443:443"
volumes:
- ./nginx/nginx.conf:/etc/nginx/nginx.conf:ro
- ./nginx/ssl:/etc/nginx/ssl:ro
depends_on:
api:
condition: service_healthy
networks:
- public_net
- internal_net
# ============================================================================
# 2. Application Backend API (Isolated from Public Internet)
# ============================================================================
api:
build:
context: .
dockerfile: Dockerfile
image: enterprise/api-service:2.1.0
container_name: enterprise_api
restart: unless-stopped
environment:
NODE_ENV: production
PORT: 3000
DATABASE_URL: postgres://appuser:{DB_PASSWORD}@postgres_db:5432/enterprise_db{DB_PASSWORD}
REDIS_HOST: redis_cache
depends_on:
postgres_db:
condition: service_healthy
redis_cache:
condition: service_healthy
networks:
- internal_net
healthcheck:
test: ["CMD", "wget", "--no-verbose", "--tries=1", "--spider", "http://localhost:3000/healthz"]
interval: 10s
timeout: 3s
retries: 3
start_period: 15s
# ============================================================================
# 3. Relational Database with Persistent Storage
# ============================================================================
postgres_db:
image: postgres:16-alpine
container_name: enterprise_postgres
restart: unless-stopped
environment:
POSTGRES_USER: appuser
POSTGRES_PASSWORD:
POSTGRES_DB: enterprise_db
volumes:
- postgres_data:/var/lib/postgresql/data
networks:
- internal_net
healthcheck:
test: ["CMD-SHELL", "pg_isready -U appuser -d enterprise_db"]
interval: 5s
timeout: 3s
retries: 5
# ============================================================================
# 4. In-Memory Cache (Redis)
# ============================================================================
redis_cache:
image: redis:7.2-alpine
container_name: enterprise_redis
restart: unless-stopped
command: ["redis-server", "--requirepass", "{REDIS_PASSWORD}"]{REDIS_PASSWORD}", "ping"]
volumes:
- redis_data:/data
networks:
- internal_net
healthcheck:
test: ["CMD", "redis-cli", "-a", "
interval: 5s
timeout: 3s
retries: 3
networks:
public_net:
driver: bridge
internal_net:
driver: bridge
internal: true # Disallows external outbound/inbound internet access
volumes:
postgres_data:
driver: local
redis_data:
driver: local
Key Architectural Features of This Compose Blueprint
• Service Healthchecks & Dependent Ordering: Using depends_on with condition: service_healthy eliminates startup race conditions, ensuring the backend API does not boot until PostgreSQL and Redis are fully initialized and responding.
• Network Segmentation: The postgres_db and redis_cache services attach exclusively to internal_net (with internal: true). They have no mapped ports to the host machine and cannot be accessed from the public internet.
• Environment Variable Decoupling: Passwords (${DB_PASSWORD}) are injected at runtime from a local .env file excluded from version control.
- Declarative Multi-Service Stack: Define complete multi-tier architectures in a single, version-controlled YAML file.
- Healthcheck Dependent Startup: Guarantee services launch only after upstream databases pass health probes.
- Zero-Exposition Database Security: Isolate databases on internal bridge networks with zero host port mappings.
8. Enterprise Container Security Hardening & Rootless Execution
Running containers with default settings presents significant enterprise security risks. Because containers share the host Linux kernel, an application running as root (UID 0) inside a container shares user ID 0 with the host system. If an attacker exploits a remote code execution (RCE) vulnerability to escape the container boundary, they immediately obtain full root privileges over the host server.
Production Hardening Checklist for 2026
• 1. Enforce Non-Root Execution: Always add a non-privileged user (USER appuser) near the end of your Dockerfile. Minimal base distributions like Distroless or Alpine make this seamless.
• 2. Drop Linux Kernel Capabilities: By default, Docker grants containers a broad subset of Linux kernel capabilities (CAP_CHOWN, CAP_NET_BIND_SERVICE). Drop all capabilities and selectively add back only those strictly required:
``yaml``
security_opt:
- no-new-privileges:true
cap_drop:
- ALL
cap_add:
- NET_BIND_SERVICE
• 3. Mount the Root Filesystem as Read-Only: Prevent attackers from downloading and executing rootkits or malware payloads by making the container's root filesystem read-only, allocating temporary in-memory tmpfs mounts for temporary write locations:
``bash``
docker run --read-only --tmpfs /tmp --tmpfs /run my-secure-app:latest
• 4. Static Image Vulnerability Scanning with Trivy: Integrate container security scanning into local developer workflows and CI/CD pipelines to catch vulnerabilities in base operating systems and third-party dependencies before deployment:
``bash``
# Scan container image for High and Critical CVE vulnerabilities
docker run --rm -v /var/run/docker.sock:/var/run/docker.sock \
aquasec/trivy:latest image --severity HIGH,CRITICAL enterprise/api-service:2.1.0
By enforcing these architectural standards, engineering teams build resilient, production-ready container infrastructures that deliver high performance, minimal resource footprints, and defense-in-depth security across every cloud environment.
- Non-Root User Enforcement: Eliminate UID 0 execution to prevent container breakout privilege escalations.
- Read-Only Root Filesystems: Prevent runtime malware installation by locking down container disk layers.
- Automated Vulnerability Scanning: Audit images against national vulnerability databases using Trivy in CI/CD.
Explore Local IT Training Programs
Top-rated job-oriented training & internships in Coimbatore & Chennai